Split Ergo Fightstick
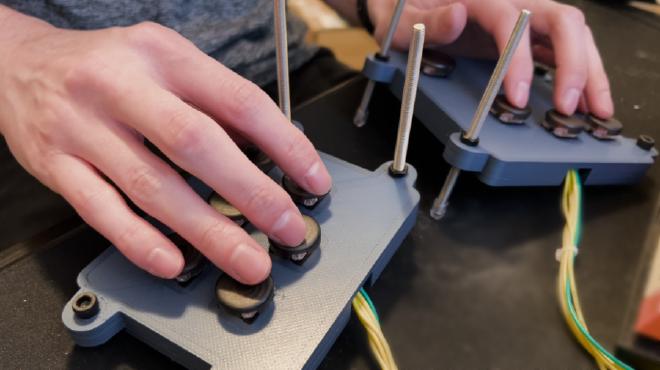
I made my first fightstick back in college with a standard joystick and button layout. Back then online play wasn’t very viable so I mostly played locals and I didn’t always get to play on my own hardware, so there was an advantage to the standardization. But I was never able to get consistent results with a traditional joystick – always felt like I was fighting my controller as much as I was fighting my opponent.
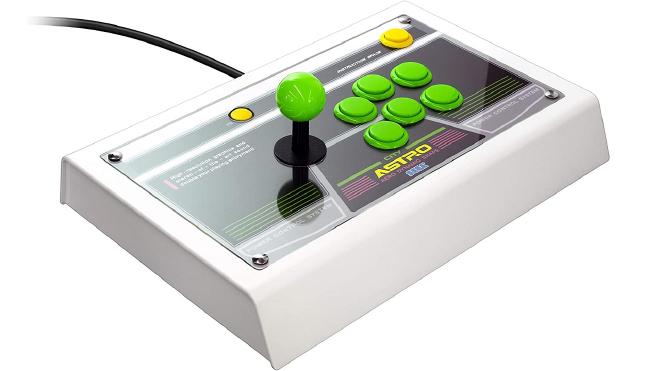
Around the time Street Fighter V came out, I built my first leverless – compared with my full wooden fightstick build, this one was a super easy build. I used a plastic storage container as the enclosure so basically all I had to do was drill the holes for the buttons and wire it up. Very ugly, very loud, but it got the job done. With the precision of leverless movement buttons, I was much more consistent with my inputs.
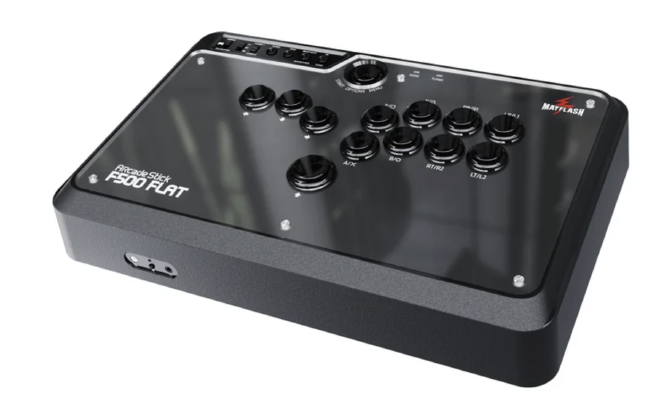
I had to leave both of these behind for a long distance move and as Street Fighter 6 approached I knew I wanted to build another leverless fightstick. By this time rollback netcode was standard in fighting games and I was mostly playing online. And I’ve gotten tired of my peripherals becoming obsolete with new consoles so I’m playing on PC. So with this new build, I wasn’t limited to what could work on my lap and I embraced the desk.
By now I had also made a lot of software for myself. When I was doing indie gamedev I put an enormous amount of time and energy into things directed at the public: marketing and sales, onboarding and tutorials, visual polish, designing things with mass appeal in mind, etc. I had since found it immensely more enjoyable to make software for myself with no plans to release anything publicly. It’s much faster to develop software this way and I can really make it purpose built for my needs. I wanted to take this same approach to this new leverless build – throw tradition to the wind, make something I could rapidly iterate on, and find out what kind of fighstick works best for me.
The basic idea is a modular fightstick that is broken out into three parts: a Directions Module that’s mostly movement, an Actions Module for the action buttons, and a Core Module with the brains. Most split fightsticks have just two halves – for a finished product, two halves probably makes more sense, but again my goal was rapid iteration so keeping the Directions and Actions modules as simple as possible makes for quicker iteration because I have the main PCB in the Core Module. Let’s quickly talk Core Module brains first.
Previously, the only PCB options were proprietary – now there’s the open source GP2040-CE firmware that runs on a $6 Raspberry Pi Pico (or anything with an RP2040). It’s fantastic and I use it in all my builds now.
One of the first decisions was deciding how to connect the modules together. Because my Actions Module didn’t have the PCB and I wanted the flexibility to have a lot of buttons, RJ45 was ruled out. USB-C has great form factor but the reversable nature effectively reduces the number of pins available. I looked into all sorts of connectors like DIN, ATX, DTM, Deutsch – even found this neat online library of connectors. I ended up settling on HDMI – 19 pins* and easy to find cables and breakout boards.
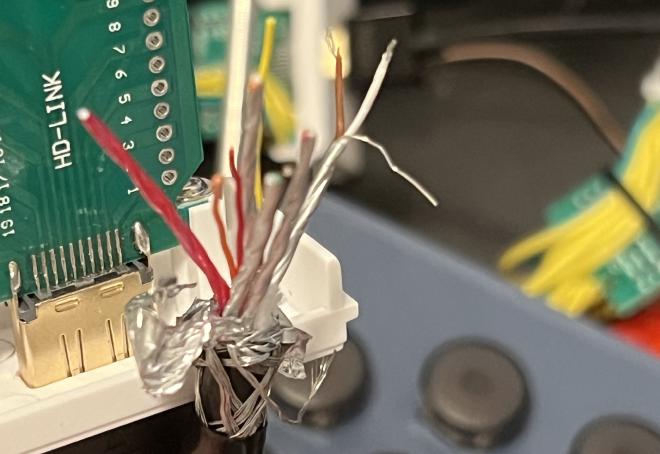
It worked.. like 99% of the time. Early on I noticed a peculiar issue where rarely, when I pressed an input, I would also get particular inputs I that didn’t press. So I tore into an HDMI cable and noticed that some of the ground pins weren’t really shielded and the current could hop over to give false signals. So for my purposes, the 19 pins were cut down to 14, though I also avoid the 5V power pin. I don’t want to test what happens when I plug a module into a TV but I figure avoiding the power pin should provide a little bit of safety. If this was intended to be a commercial product, maybe HDMI cables would be a bad idea – at least not without proper testing for safety to account for someone inevitably plugging their fightstick directly into a TV or computer’s HDMI port.
Ok so we’ve covered the brains and the nervous system of the fightstick, now let’s finally talk button modules. Wood and pre-made plastic enclosures are great, but I wanted rapid iteration. I had a 3D printer and wanted to learn CAD so that’s the route I took. Fusion 360 had recently neutered their free version so I went with open source FreeCAD.
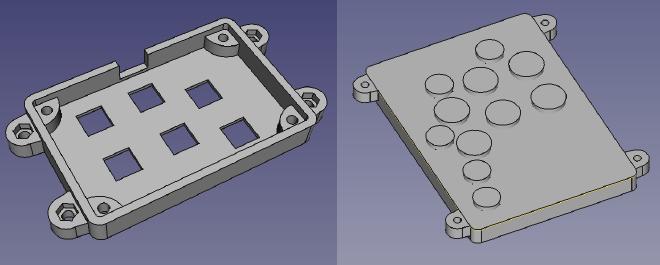
I had used FreeCAD to create a couple earlier prototypes of traditional leverless fightsticks but this time I wanted to take advantage of parametric design. Took a while to get the hang of, but parametric design is quite cool. I could change dimensions in a spreadsheet and it would automatically adapt the model to place all the screw holes, feet holes, etc. I could similarly modify wall/lid thickness, screw sizes, etc and it would all adapt dynamically. The only manual part was deciding where the buttons would go.
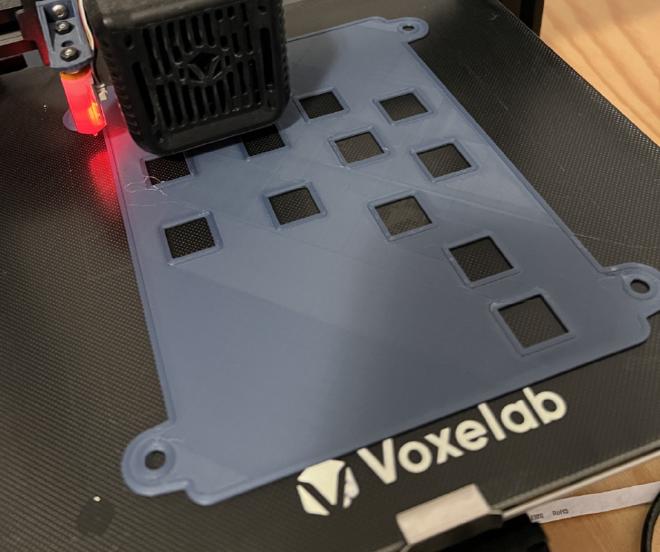
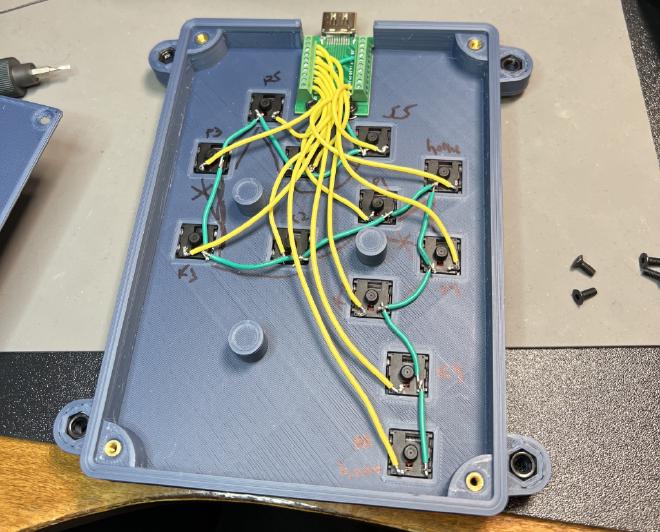
These quick prototypes are wired by manually soldering directly to the switches. Heated threaded inserts are used to attach the lid. I just glue nuts into the feet holes so I can screw in the tenting feet later. The first set of modules just had wires coming out to an HDMI breakout board, but for the second set (pictured) I mounted the HDMI breakout board inside the module for a cleaner build.
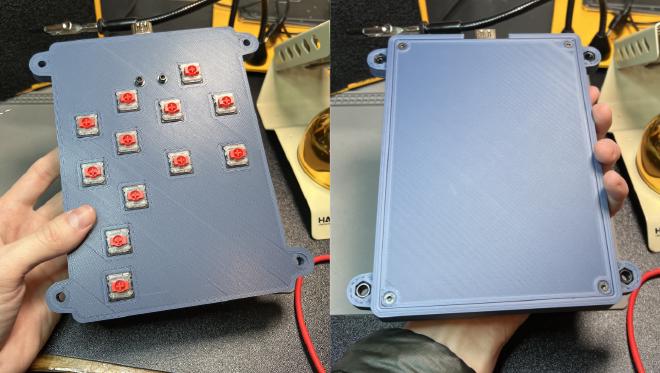
I used Gateron low profile red switches. They feel great and are more affordable than the Kailh Choc V1/V2. The cherry stems are compatible with the nice injection molded keycaps you can get from Sinoarcade. For final builds I may use Kailh Choc V2 though – the variety of switches is a big advantage (I use Haute42’s Wind Engine switches in another build).
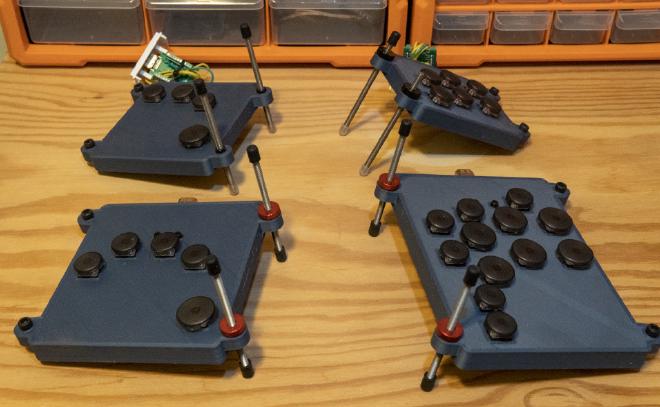
The tented design is extremely comfortable (and was the only reason I could play fighting games in a cast after I fractured my wrist in early 2024) and the rubber feet keep them in place better than I expected. I’ve only made two sets of Direction and Action Modules. The first set were just the basics using standard layouts to make sure it worked as expected. The second set were inspired by Street Fighter 6. I found an extra pinky button on the Directions Module was perfect for Drive Impact or Drive Parry. I didn’t really know where extra buttons would feel nice on the Actions Module so I just added them anywhere I thought might work. For what it’s worth, my favorite were the extra thumb button below LK and the extra button between LP and MP. I’d like to make more iterations based on what I’ve found playing with other builds. For Direction Module, an extra thumb button to the left of jump is handy. For Actions Module, an extra pinky button to the right of HP and HK would be nice. I’d even like to experiment with designs that don’t have all the buttons on the same physical plane. And I’ve been wanting to learn KiCAD and design my first custom PCB – will probably do that for the Core module because right now the Core Module is a mess of wires on my desk.
This was my main driver for many months but lately I haven’t been using the split ergo fightstick! As mentioned earlier, this was designed for desk play. I have thought of funny ways to strap them to my legs so that it works in my lap, but I started going to locals and taking part in local tournaments and quickly needed something I could play in my lap. So I purchased a Haute42 M16 and have mostly been practicing with that lately. Hopefully I’ll have time to return to the split ergo fightstick soon though.
